


Aide · Votre menu
Menu : catégories et plats
Construisez le menu que voient vos clients : catégories, plats, prix, étiquettes, épuisé, et ce que vend chaque adresse.
Inclus dans toutes les formules.
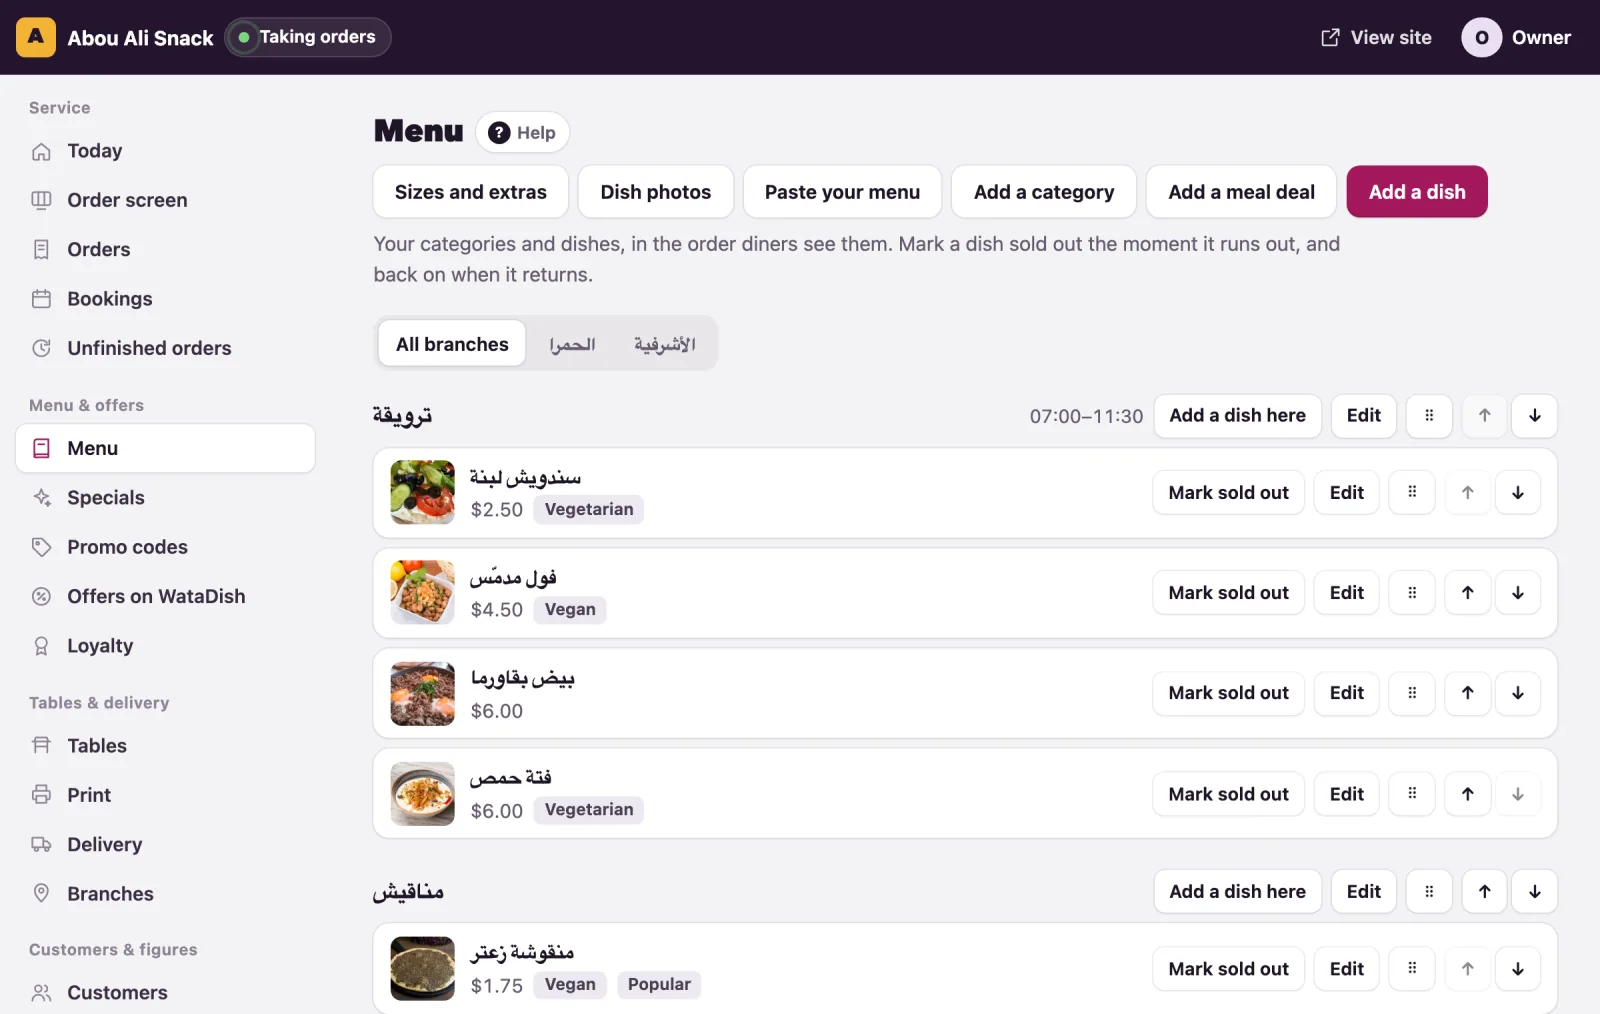
The Menu page is your menu as diners see it: your categories and dishes, in the order they appear on your site. A category is a heading of the menu with its dishes under it; every dish lives in one. The owner and managers shape the menu; staff open the same page only to mark a dish sold out and back. A combination sold at one price, such as a sandwich, a side and a drink, is a meal deal: Add a meal deal builds it from your dishes (see Meal deals).
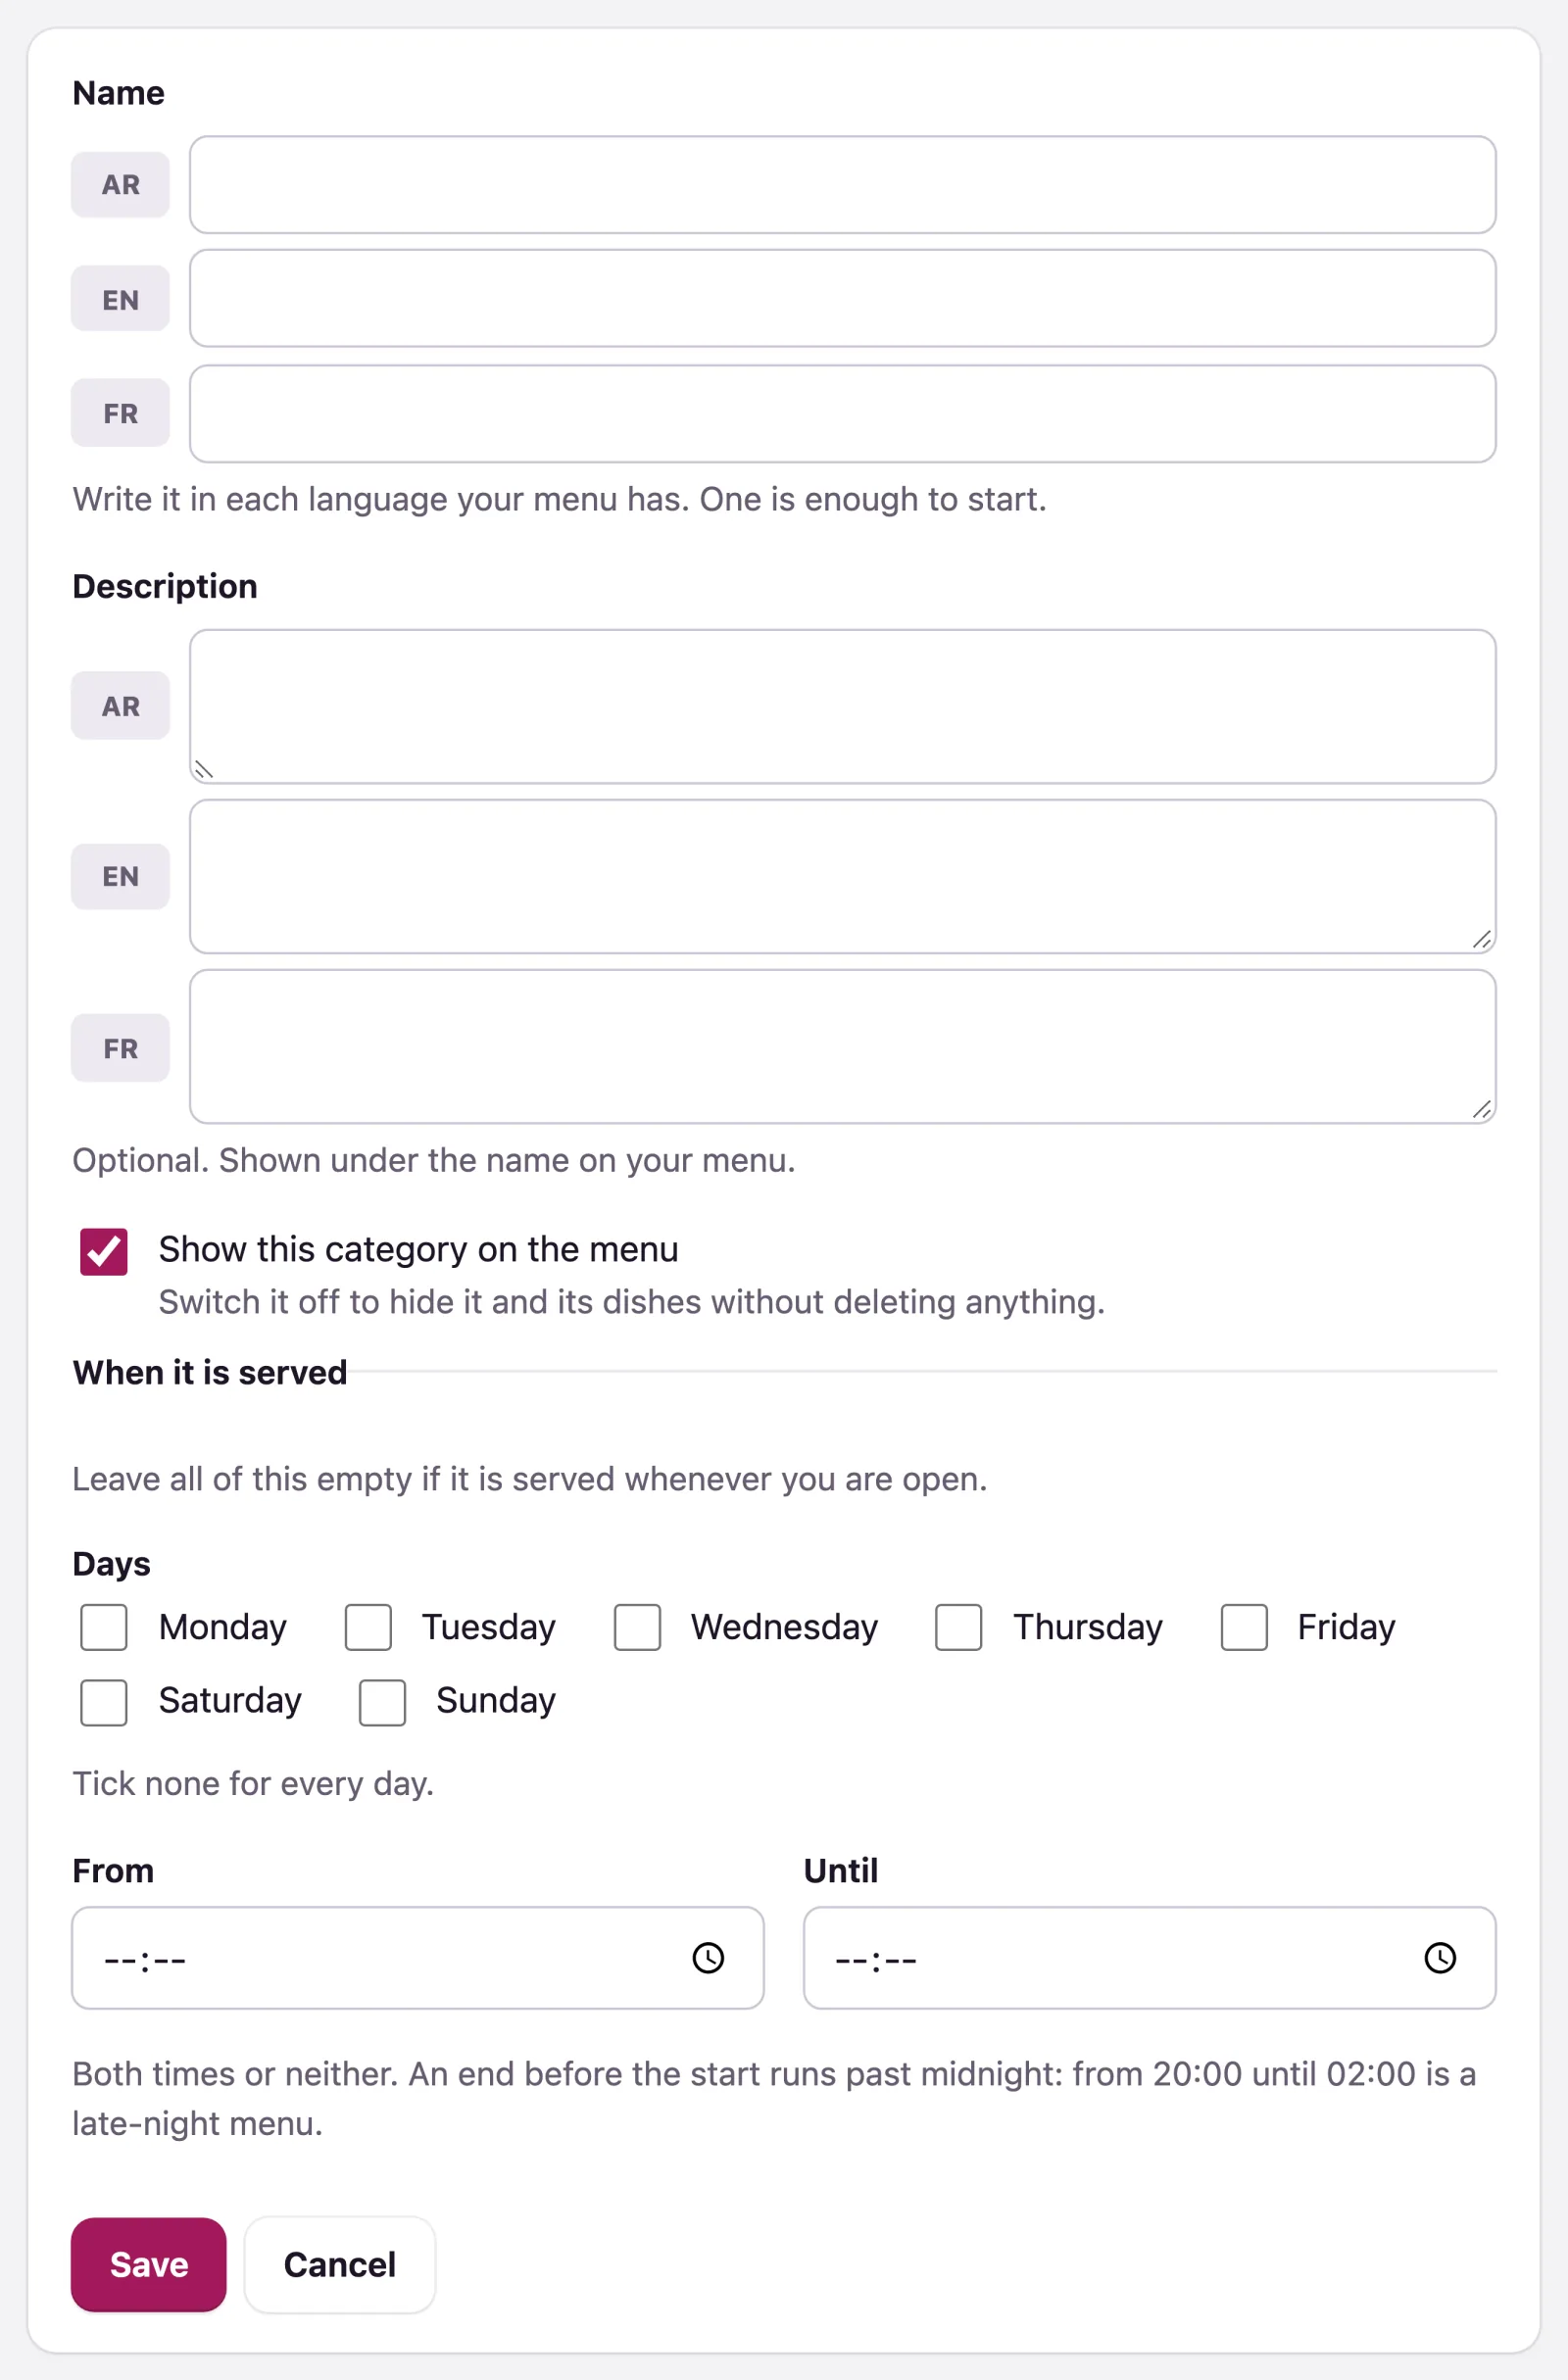
Add a category
- On Menu, press Add a category.
- Give it a Name in each language your menu has; one is enough to start. A Description is optional, shown under the name.
- Leave Show this category on the menu ticked. Unticked, it hides the category and its dishes without deleting anything; the list marks them "Hidden".
- Save. On the Menu page, drag it by its ⠿ handle to where you want it, or use the Move up and Move down arrows beside it.
Where your plan includes serving a category on some days or at some hours only, the form also has When it is served: tick Days (none for every day) and give From and Until, both or neither; from 20:00 until 02:00 runs past midnight. Diners see "Served 07:00–11:30" and, outside those hours, "Not served right now" (with "order it for later" where they can order ahead). Without the plan, every category is served whenever you are open.
To remove a category, open it with Edit and press Delete this category: its dishes go with it, and this cannot be undone.
Add a dish
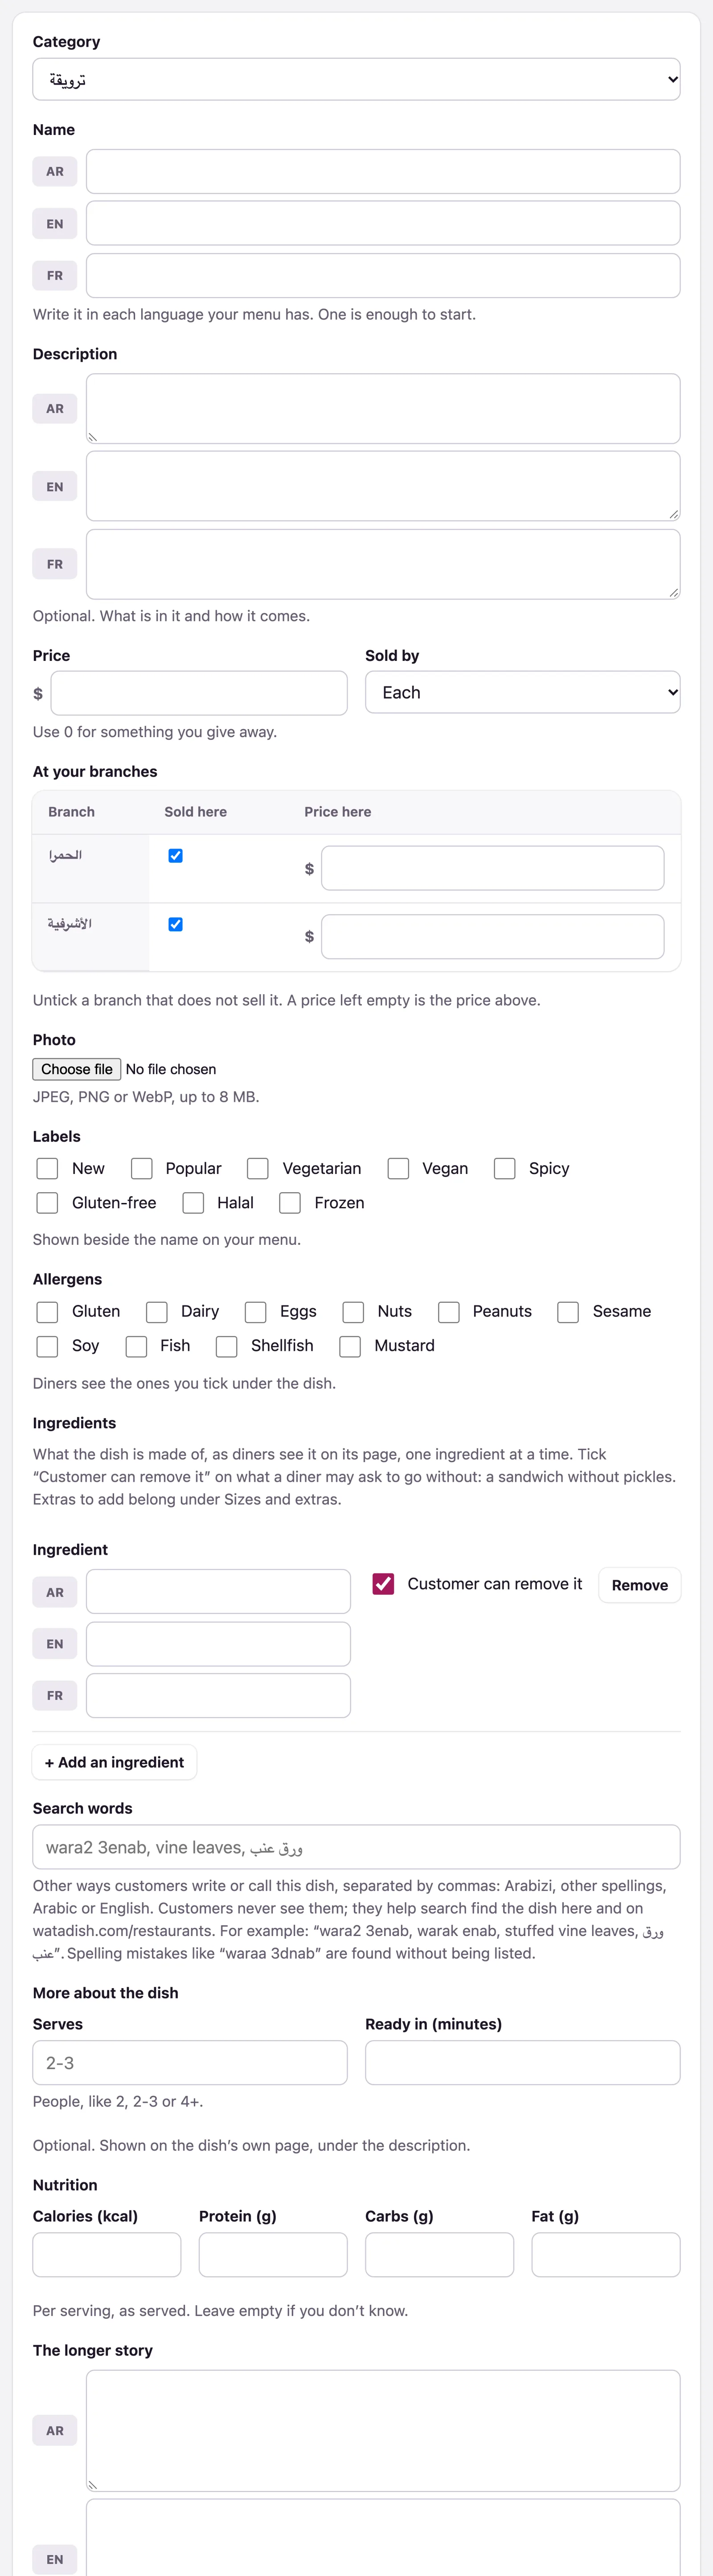
- Press Add a dish, or Add a dish here on its category.
- Choose its Category, give its Name in each language and, if you like, a Description.
- Type its Price, such as 8.50; 0 for something you give away. Sold by is Each, The pack or The kilo; the menu tags a dish "By the pack" or "By the kilo".
- Add a Photo (JPEG, PNG or WebP, up to 8 MB). To give every dish one in one place, see Dish photos.
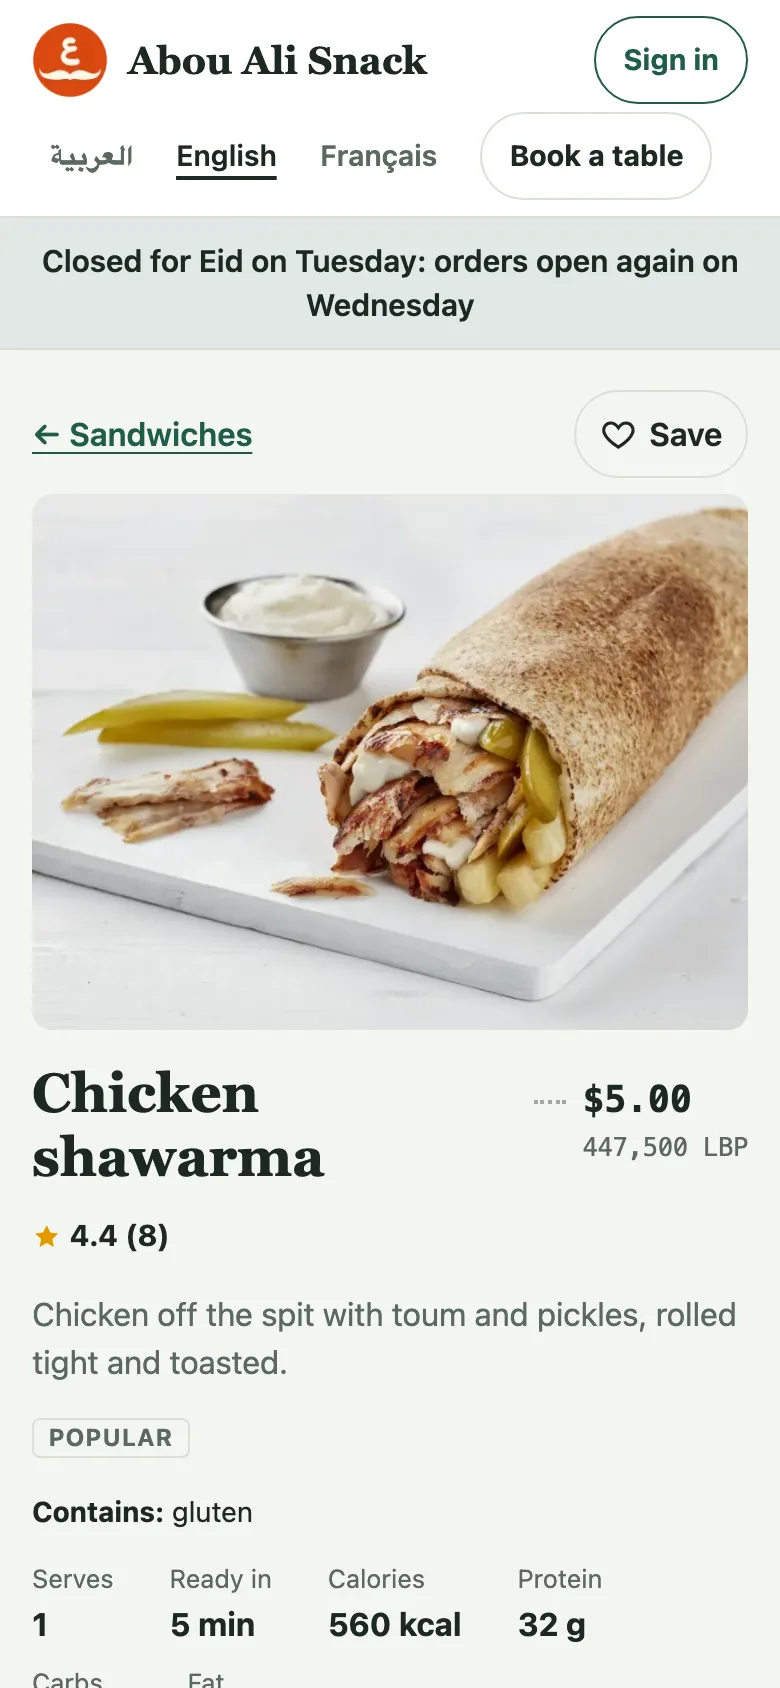
- Tick its Labels (New, Popular, Vegetarian, Vegan, Spicy, Gluten-free, Halal, Frozen), shown beside the name, and its Allergens (Gluten, Dairy, Eggs, Nuts, Peanuts, Sesame, Soy, Fish, Shellfish, Mustard), shown as "Contains: gluten, dairy" under the dish.
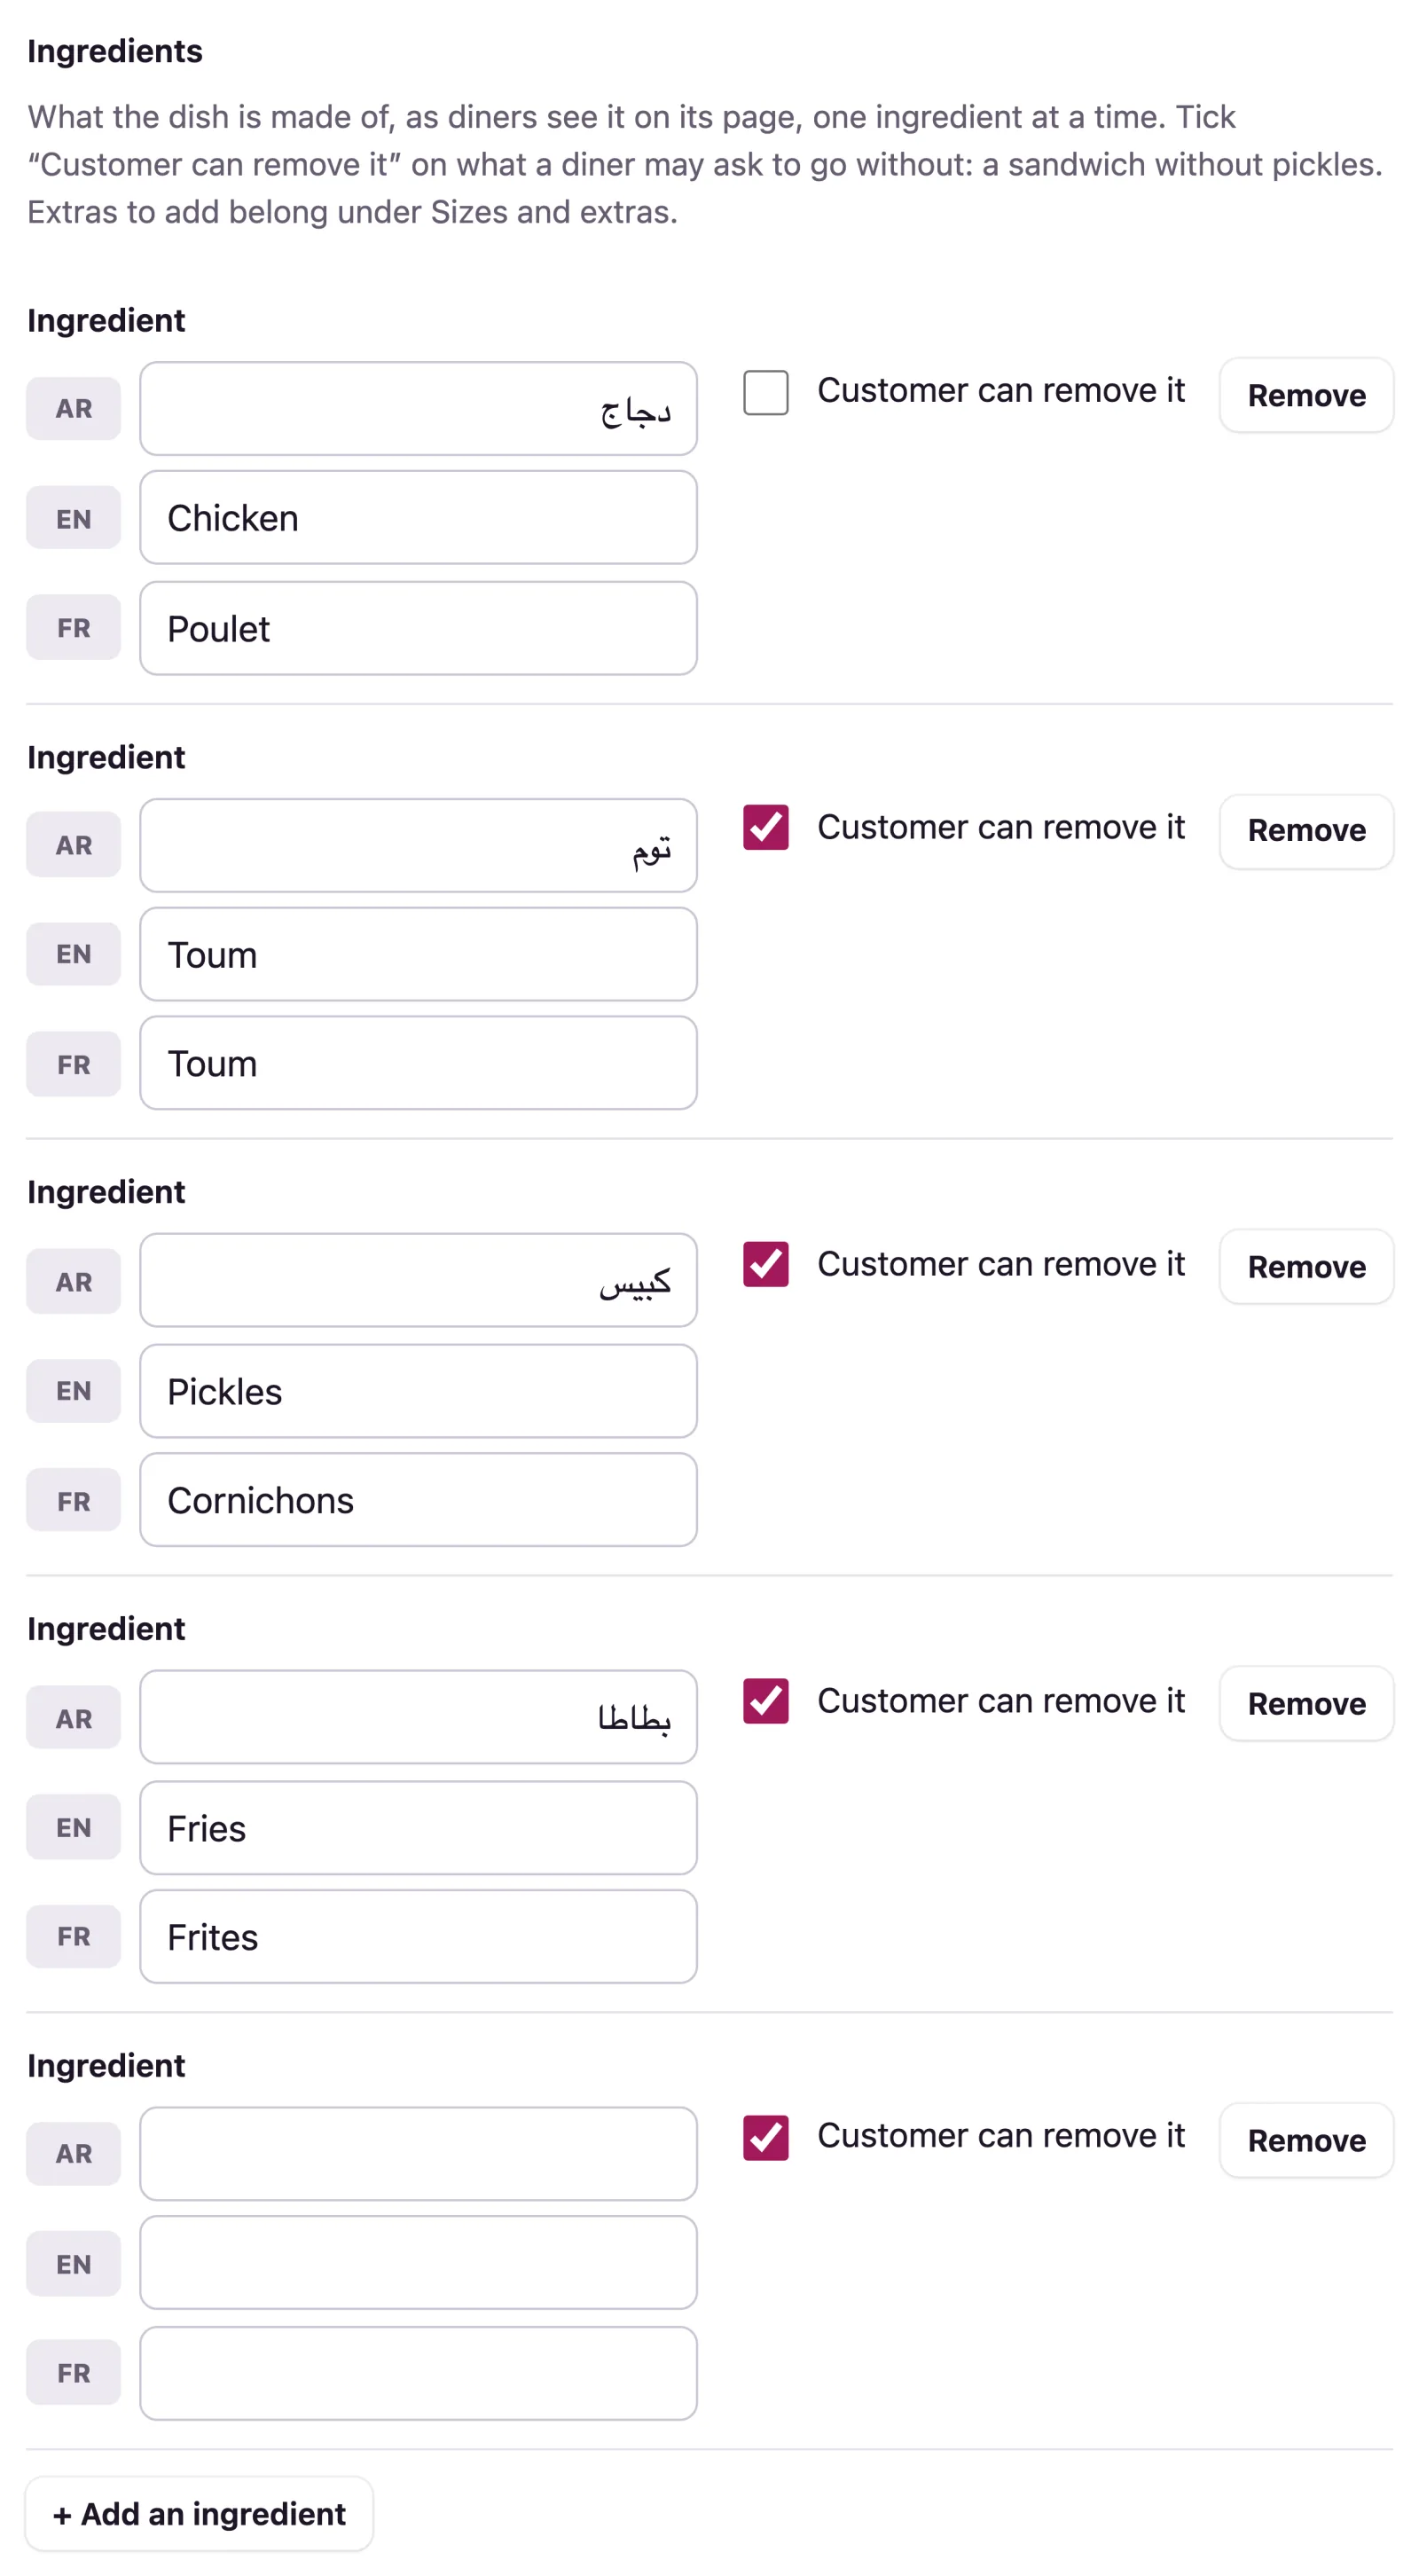
- List its Ingredients, one per row (+ Add an ingredient for the next), in each language of your menu, and tick Customer can remove it on each one a diner may ask to go without (pickles, onion, toum). Diners see the list on the dish's page and untick what they do not want; the kitchen reads "− Pickles" under the dish. Leave the rows empty for a dish nobody changes: see Dish options and extras.
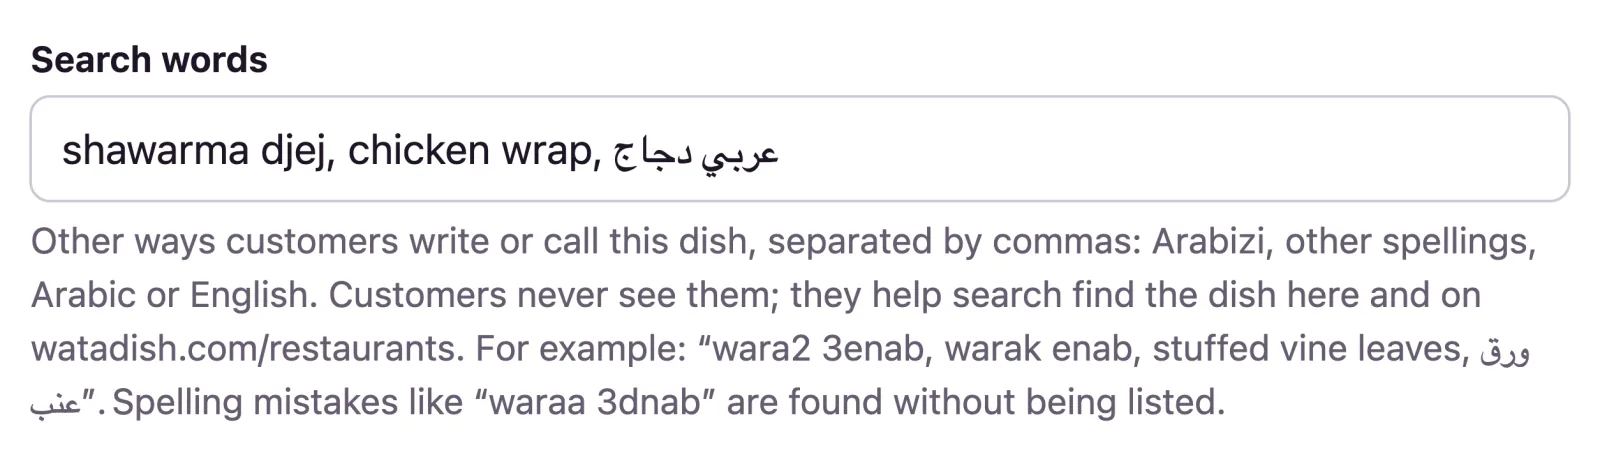
- Under Search words, give the other ways customers write or call the dish, separated by commas: Arabizi ("shawarma djej"), another spelling, a name in Arabic or English ("chicken wrap"). Customers never see them; they help the menu's search, and watadish.com/restaurants, find the dish. Spelling mistakes are found without being listed: see "How diners find a dish" below.
- Where your plan has dish details, fill in More about the dish: Serves (2, 2-3 or 4+) and Ready in (minutes); then Nutrition: Calories (kcal), Protein (g), Carbs (g) and Fat (g), per serving as served (12.5 or 12,5 both read); and The longer story, for the dish's own page. Leave a value empty if you don't know it: diners see only the ones you fill in, like "520 kcal · Protein 32 g". Where a choice adds to them (a large size, extra cheese), give that on the group's form and the dish page adds it up as the diner picks: see Dish options and extras.
- Under Sizes and extras, tick the groups of choices it offers: see Dish options and extras.
- Leave Show this dish on the menu ticked (unticked hides it without deleting it), and Save.
To put dishes in order, drag one by its ⠿ handle (on a phone, hold the handle and slide), or use the arrows beside it to move it one place. Drag a dish onto another category, even an empty one, to move it there, or choose its Category on its form. Delete this dish on its form removes it for good.
Branches
With branches, the dish form lists each under At your branches: untick Sold here for a branch that does not sell the dish, and give a Price here where it costs something else there. On the Menu page, the All branches tab and a tab for each branch show the list as that branch sells it, with "Not sold here" on a dish it leaves out.
Sold out, and back
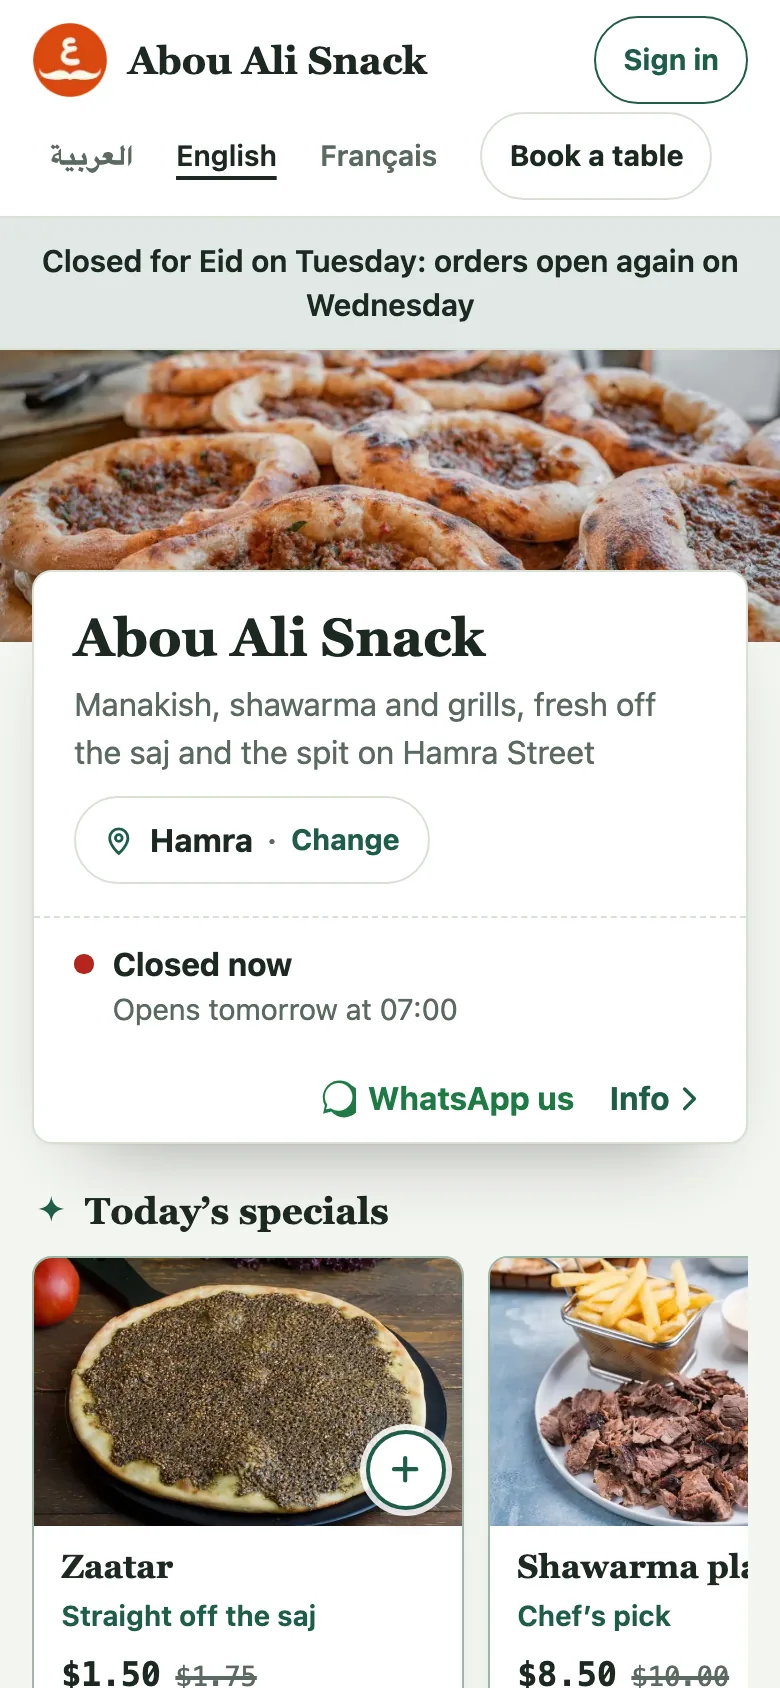
When a dish runs out, press Mark sold out beside it: diners still see it, greyed, with a "Sold out" tag and no Add button. Press Back on the menu when it returns. Staff can do this from the pass. With branches, pressing it on a branch's tab marks the dish out at that branch only ("Zaatar is sold out at Hamra.").
Where your plan counts stock, the dish form has How many are left; leave it empty if you do not count. Each order takes from the count, the list shows "3 left", and at 0 the dish shows as sold out. A fresh count puts it back on; a dish you marked sold out by hand stays out until you press Back on the menu.
The dish limit
Where your plan caps the number of dishes, the page says "18 dishes of the 50 your plan allows." At the limit the Add a dish button goes and adding one is refused: "Your plan allows 50 dishes. Remove one, or move to a larger plan." The owner is offered See the plans; a manager is told the owner can move to a larger plan from the Plan page. On a closed account everything can be looked at, but nothing changed.
What diners see
The menu lists your categories in order, with a bar at the top to jump between them; a hidden category or dish, or a category with no dishes, is not there. Each dish shows its name, price, description, labels and photo (or its first letter), with Add, or Choose when it asks for a choice first. Its own page shows the photo wide, the full description, "Contains:", the details and the story.
How diners find a dish
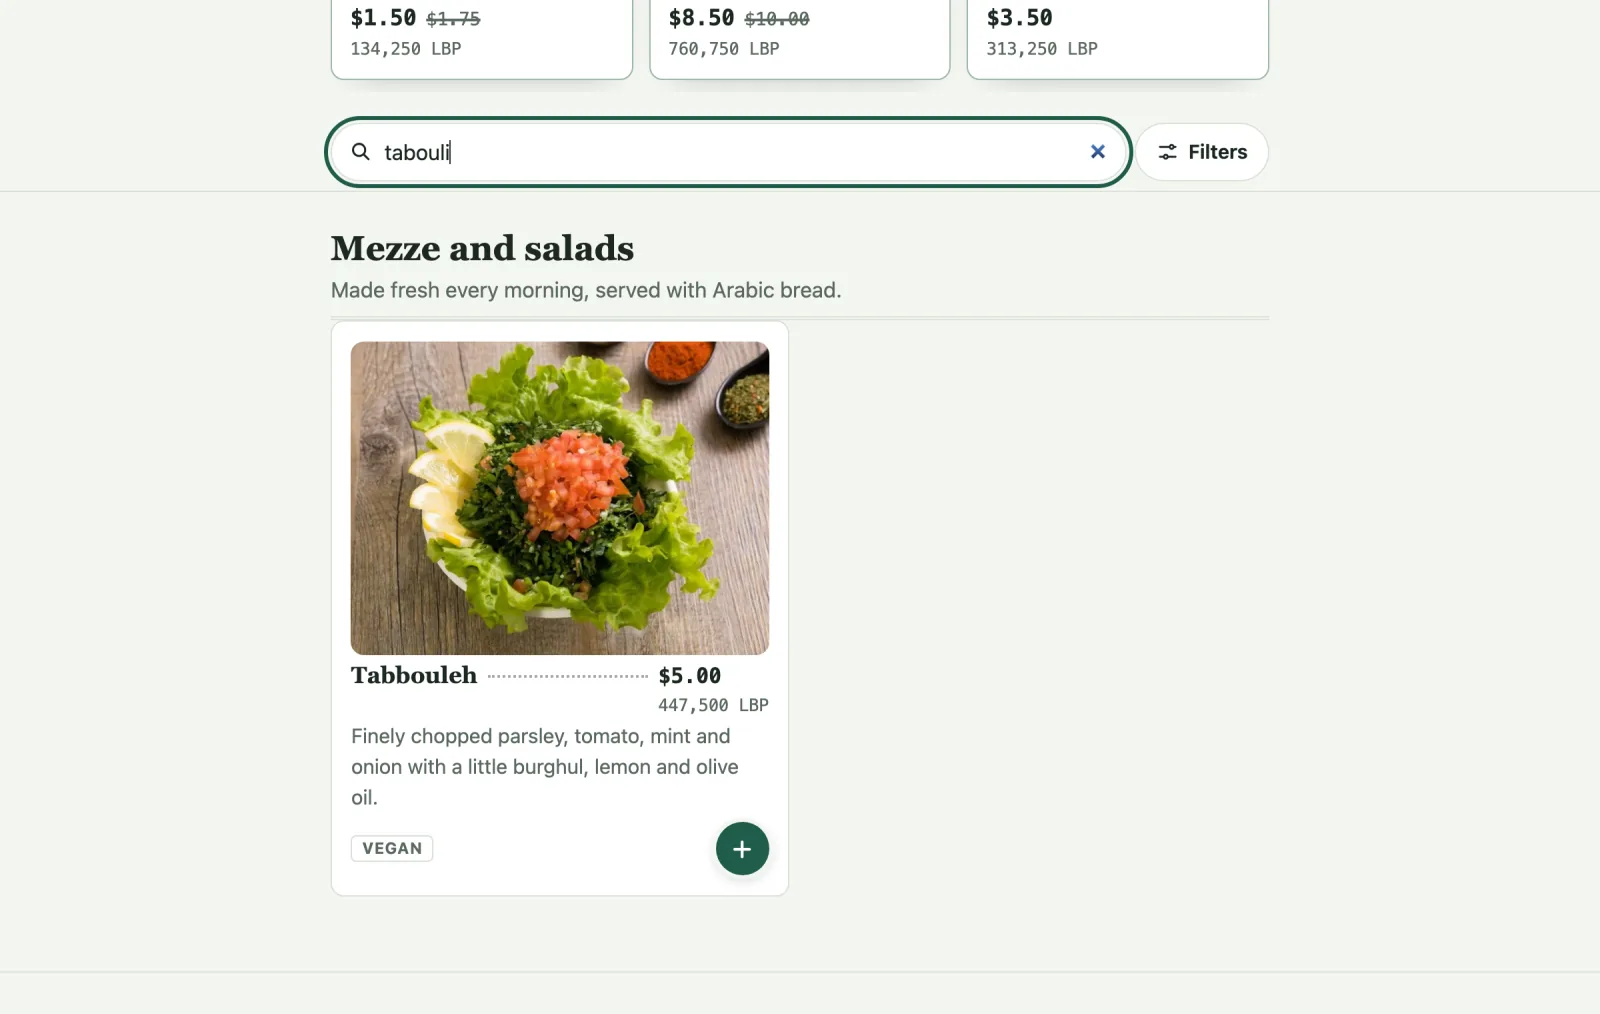
The menu has a search at the start of its bar (on a phone, a magnifier to tap). It reads each dish's name, description, ingredients, category and search words, in every language of your menu, so a diner can type in theirs whichever language the page is in. It forgives spelling: a letter off in a short word, two in a long one, so "shawerma" and "chawarma" find Shawarma. It also goes by sound across Arabic, Latin letters and Arabizi, so "7ommos" finds Hummus and "wara2 3enab" finds Warak enab, as does ورق عنب. Where your restaurant is shown on watadish.com/restaurants (see Order on WataDish), its search finds your dishes the same way and leads to them on your menu.
Vous n’avez pas trouvé ce que vous cherchiez ? Écrivez-nous à support@watadish.com ou envoyez-nous un message sur WhatsApp: WhatsApp